Difference between revisions of "New user training"
| Line 19: | Line 19: | ||
===HiPerGator=== | ===HiPerGator=== | ||
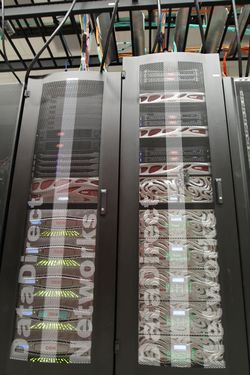
| − | * About 60,000 cores [[File: | + | * About 60,000 cores [[File:Hpg3-rc-header.png|300px|right|text-top|alt="A row of HiPerGator 3 compute node racks"]] |
* Hundreds of GPUs | * Hundreds of GPUs | ||
* 10 Petabytes of storage | * 10 Petabytes of storage | ||
| Line 50: | Line 50: | ||
---- | ---- | ||
| + | |||
==Module 2: How to Access and Run Jobs== | ==Module 2: How to Access and Run Jobs== | ||
Revision as of 17:33, 11 February 2021
This page mirrors and expands upon the content provided in the HiPerGator Account Training module in myTraining. This is myTraining course code UF_ITT423_OLT, called "HiPerGator Account Training".
Note: While this page mirrors the content, to get credit for taking the training, you must complete the training and pass the assessment on the myTraining site
Effective January 11th, 2021, this raining module is required for all new account holders to obtain an account. New accounts will not be created until the myTraining system records successful completion of the training.
Training Objectives
- Recognize the role of Research Computing, utilize HiPerGator as a research tool and select appropriate resource allocations for analyses
- Login to HiPerGator using an ssh client
- Describe appropriate use of the login servers and how to request resources for work beyond those limits
- Describe HiPerGator's three main storage systems and the appropriate use for each
- Use the module system for loading application environments
- Locate where to receive user support
- Identify common user mistakes and how to avoid them.
Module 1: Introduction to Research Computing and HiPerGator
HiPerGator
- About 60,000 cores
- Hundreds of GPUs
- 10 Petabytes of storage
- New HiPerGator AI cluster will add
- 1,120 NVIDIA A100 GPUs
- 17,000 AMD Rome Epyc Cores
For additional information visit our website: https://www.rc.ufl.edu/
The Cluster History page has updated information on the current and historical hardware at Research Computing.
Summary: HiPerGator is a large, high-performance compute cluster capable of tackling some of the largest computational challenges, but users need to understand how to responsibly and efficiently use the resources.
Investor Supported
HiPerGator is heavily subsidized by the university, but we do require faculty researchers to make investments for access. Research Computing sell three main products:
- Compute: NCUs (Normalized Compute Units)
- 1 CPU core and 3.5 GB of RAM
- Storage:
- Blue (
/blue): High-performance storage for most data during analyses - Orange (
/orange): Intended for archival use
- Blue (
- GPUs
- Sold in units of GPU cards
- NCU investment also required to make use of GPU
Investments can either be hardware investments, lasting for 5-years or service investments lasting 3-months or longer.
- Price sheets are located here: https://www.rc.ufl.edu/services/rates/
- Submit a purchase request here: https://www.rc.ufl.edu/services/purchase-request/
- For a full explanation of services offered by Research Computing, see: https://www.rc.ufl.edu/services/
Module 2: How to Access and Run Jobs
Cluster Components
Accessing HiPerGator
- jhub.rc.ufl.edu (requires UF Network)
- See also
 overview video.
- See also
- galaxy.rc.ufl.edu
- Open on Demand: ood.rc.ufl.edu (requires UF Network)
- See also
 overview video.
- See also
Proper use of Login Nodes
- Generally speaking, interactive work other than managing jobs and data is discouraged on the login nodes.
- Login nodes are intended for file and job management, and short-duration testing and development.
Acceptable use limits:
- No more than 16-cores
- No longer than 10 minutes (wall time)
- No more than 64 GB of RAM
Resources for Scheduling a Job
For use beyond what is acceptable on the login servers, you can request resources on development servers, GPUs servers, through JupyterHub, Galaxy, Graphical User Interface servers via open on demand or submit batch jobs. All of these services work with the scheduler to allocate your requested resources so that your computations run efficiently and do not impact other users.
- Development Servers
- GPU Servers
- Galaxy
- SLURM Scheduler Sample Scripts
- GUI servers, including Open on Demand
- Jupyter Hub
Scheduling a Job
- Understand the resources that your analysis will use:
- CPUs: Can your job use multiple CPU cores? Does it scale?
- Memory: How much RAM will it use? Requesting more will not make your job run faster!
- GPUs: Does your application use GPUs?
- Time: How long will it run?
- Request those resources:
- See sample job scripts
- Watch the HiPerGator: SLURM Submission Scripts training video. This video is approximately 30 minutes and includes a demonstration

- Watch the HiPerGator: SLURM Submission Scripts for MPI Jobs training video. This video is approximately 26 minutes and includes a demonstration

- Open on Demand, JupyterHub and Galaxy all have other mechanisms to request resources as SLURM needs this information to schedule your job.
- Submit the Job
- Either using
sbatchon the command line or through on of the interfaces - Once your job is submitted, SLURM will check that there are resources available in your group and schedule the job to run
- Either using
- Run
- SLURM will work through the queue and run your job
Module 3: HiPerGator Storage
Three Locations for Storage
The storage systems are reviewed on this page.
Note: In the examples below, the text in angled brackets (e.g. <user>) indicates example text for user-specific information (e.g. /home/albertgator).
- Home Storage:
/home/<user>- Each user has 40GB of space
- Good for scripts, code and compiled applications
- Do not use for job input/output
- Snapshots are available for seven days
- Blue Storage:
/blue/<group>- Our highest-performance filesystem
- All input/output from jobs should go here
- Orange Storage:
/orange/<group>- Slower than /blue
- Not intended for large I/O for jobs
- Primarily for archival purposes
Backup and Quotas
- Unless purchased separately, nothing is backed up on HiPerGator!!
- Orange and Blue storage quotas are at the group level and based on investment.
Directories
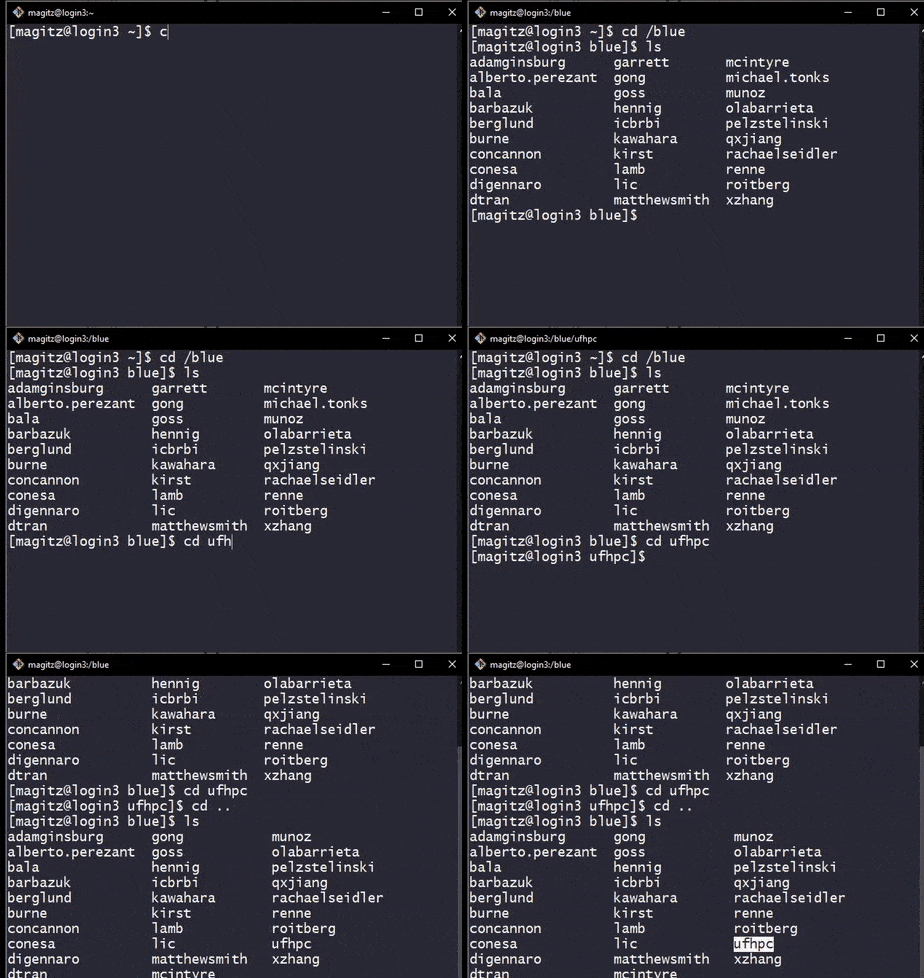
- Directories on the Orange and Blue filesystems are automounted--they are only added when accessed.
- Your group's directory may not appear until you access it.
- Remember
- Directories may not show up in an
lsof/blueor/orange- If you
cdto/blueand typels, you will likely not see your group directory. You also cannot tab-complete the path to your group's directory. However, if you add the name of the group directory (e.g.cd /blue/<group>/the directory becomes available and tab-completion functions. - Of course, there is no need to change directories one step at a time...
cd /blue/<group>, will get there in one command.
- If you
- You may need to type the path in SFTP clients or Globus for your group directory to appear
- You cannot always use tab completion in the shell
- Directories may not show up in an
Environment Modules System
- HiPerGator uses the lmod environment modules system to hide application installation complexity and make it easy to use the installed applications.
- For applications, compilers or interpreters, load the corresponding module
- More on the module system
- Basic module use
- Installed Applications
Module 4: Common User Mistakes and How to Avoid Them
- Running resource intensive applications on the login nodes
- Submit a batch job: see Sample Slurm Scripts
- Request a development session for testing and development
- Writing to
/homeduring batch job execution- Use
/blue/<group>for job input/output. See Storage.
- Use
- Wasting resources
- Understand CPU and memory needs of your application
- Over-requesting resources generally does not make your application run faster--it prevents other users from accessing resources.
- Blindly copying lab mate scripts
- Make sure you understand what borrowed scripts do
- Many users copy previous lab mate scripts, but do not understand the details
- This often leads to wasted resources
- Misunderstanding the group investment limits and the burst QOS
- Each group has specific limits
- Burst jobs are run as idle resources are available
- The
slurmInfocommand in the ufrc module can show your group's investment and current use.
- The
Module 5: How to get Help
- Submit support requests at: https://support.rc.ufl.edu/
- For problems with running jobs, provide:
- JobID number(s)
- Path(s) to job scripts and output
- As much detailed information as you can about your problem
- For requests to install an application, provide:
- Name of application
- URL to download the application
Additional information for students using the cluster for courses
- The instructor will provide a list of students enrolled in the course
- Students who do not have a HiPerGator Account will have one created for them
- Students who already have a HiPerGator Account will be added to the course group (as a secondary group)
- You can create a folder in the class's
/bluefolder with your GatorLink username - To use the resources of the class rather than your primary group, load the class module:
module load class/pre1234(wherepreis the course prefix, and1234is the course number)
- You can create a folder in the class's
- Using your account implies agreeing to the Acceptable use policy.
- Students understand that no restricted data should be used on HiPerGator
- Classes are typically allocate 32-cores, 112GB RAM and 2TB of storage
- Instructors should keep this in mind when designing exercises and assignments
- Students should understand that these are shared resources: use them efficiently, share them fairly and know that if everyone waits until the last minute, there may not be enough resources to run all jobs.
- All storage should be used for research and coursework only.
- Accounts created for the class and the contents of the class
/bluefolder will be deleted at the end of the semester. Please copy anything you want to keep off of the cluster before the end of the semester. - Students should consult with their professor or TA rather than opening a support request. Only the professor or TA should open support requests if needed.


