GUI Programs: Difference between revisions
Moskalenko (talk | contribs) No edit summary |
Moskalenko (talk | contribs) |
||
| Line 2: | Line 2: | ||
{{HPG2}} | {{HPG2}} | ||
=Xpra | =Upstream Xpra Documentation = | ||
Revision as of 21:18, 15 July 2016
 HiPerGator 2.0 documentation |
Upstream Xpra Documentation
- Xpra Homepage: https://xpra.org/
- Xpra Basic Usage: https://xpra.org/trac/wiki/Usage
- Xpra Advanced Usage: http://xpra.org/manual.html
Step 1: Client Installation
Xpra client installation depends on what operating system is running on your local machine.
Linux
The recommended option is to use the distribution specific packages if possible:
Ubuntu/Debian
sudo apt-get install xpra
CentOS/RHEL
sudo su -
rpm --import https://winswitch.org/gpg.asc
cd /etc/yum.repos.d/
curl -O https://winswitch.org/downloads/CentOS/winswitch.repo
yum install xpra
Windows
XP and Newer
Download and install MS Windows files: from https://xpra.org/, Installer file can be found at https://xpra.org/dists/windows/Xpra_Setup.exe. Note that installation will require an account with Admin privileges.
MAC OS
OS X 10.5 and Newer
Download and install MAC installer files: from https://xpra.org/, Installer file can be found at https://xpra.org/dists/osx/x86/Xpra.dmg. Note that installation will require an account with Admin privileges.
Step 2: Starting your application on HiPerGator
The simplest way to start a GUI application session on HiPerGator is to use the wrapper scripts in a job script. For example, a SLURM job script can have the following to start the emacs editor GUI:
module load gui
xpra_start emacs
There are other wrapper scripts. For example,
xpra_list_sessions will refresh the Xpra session list and provide a convenient list of live Xpra sessions as well as commands that can be copied and pasted into a terminal on the client machine.
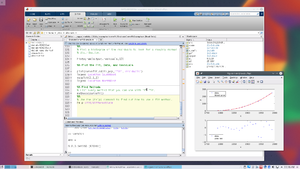
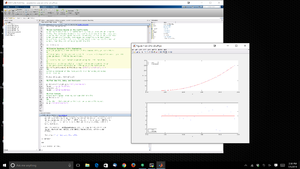
Some applications, like matlab and rstudio need more care to be started under Xpra. For them, we have additional wrappers like xpra_start_matlab or xpra_start_rstudio.
Step 3: Connect to Xpra Session from the client side
Linux:
Xpra is typically automatically added to your path during installation, so you can connect to your running xpra instance using the following syntax where $USERNAME is your UF GatorLink user-name, $SERVERNAME is the server where your application is running inside xpra, and $PORT is the X11 port you assigned when you started your application.
xpra attach ssh:$USERNAME@$SERVERNAME:$PORT
As an example:
testuser@jr-physics:~$ xpra attach ssh:testuser@i21a-s3.rc.ufl.edu:143 --desktop-scaling=on --dpi=96

MAC OS:
Navigate to the folder that contains the xpra executable:
cd /Applications/Xpra.app/Contents/MacOS
Second, connect to your running xpra instance using the following syntax where $USERNAME is your GatorLink user-name, $SERVERNAME is the server where your application is running inside xpra, and $PORT is the X11 port you assigned when you started your application.
./Xpra attach ssh:$USERNAME@$SERVERNAME:$PORT
Example:
./Xpra attach ssh:test-user@i21a-s3.rc.ufl.edu:143 --desktop-scaling=on --dpi=96
Microsoft Windows
First, navigate to the install location of xpra (normally C:\Program Files (x86)\Xpra\).
- In MobaXterm
cd /drives/c/Progam\ Files\ \(x86\)/Xpra/
Second, connect to your running xpra instance using the following syntax where $USERNAME is your GatorLink user-name, $SERVERNAME is the server where your application is running inside xpra, and $PORT is the X11 port you assigned when you started your application.
./xpra attach ssh:$USERNAME@$SERVERNAME:$PORT
- Example
./xpra attach ssh:testuser@i21a-s3.rc.ufl.edu:143 --desktop-scaling=on --dpi=96

- NOTE
- If you close the window using the close button, this will exit your application just like a native application. If you want to simply detach the session and come back later, please follow the detaching xpra session instructions below
Step 4: Detaching Xpra Session
These instructions allow you to detach a running xpra client without closing the application.
Linux and MAC OS
In the original terminal where you activated the client, simply press Control-C to detach the session.
2016-04-06 15:18:17,173 Attached to ssh:testuser@i21a-s3.rc.ufl.edu:143 (press Control-C to detach)
^C
got signal SIGINT, exiting
2016-04-06 15:18:42,513 Connection lost
You can re-attach to the running application using the xpra attach command as described in the instructions above.
Windows
- Start a new console and navigate to the xpra directory as shown above.
- Run the following command where $USERNAME is your UF GatorLink user-name, $SERVERNAME is the server where your application is running inside xpra, and $PORT is the X11 port you assigned when you started your application.
./xpra detach ssh:$USERNAME@$SERVERNAME:$PORT
- Example
cd "C:\Program Files (x86)\Xpra"
./xpra detach ssh:testuser@i21a-s3.rc.ufl.edu:143
- Note
- If you are using mobaXterm, you can press Control-C in the mobaXterm window to detach, just like using the Linux client.